Do this immediately
Control sightlines, movement, and distance first. These threats usually punish panic more than aggression.
Enemy Guide
Control sightlines, movement, and distance first. These threats usually punish panic more than aggression.
Do not freeze, over-watch, or turn a hallway problem into a full-team panic response.
These enemies are often route and awareness checks, not straight damage races.
Most enemy wipes happen because the team is juggling too many things at once when the threat appears.
Good enemy handling tends to be one clean action, not a long chain of second-guesses.
Repeated encounters usually point to a route, item, or intake problem that another guide can fix better.
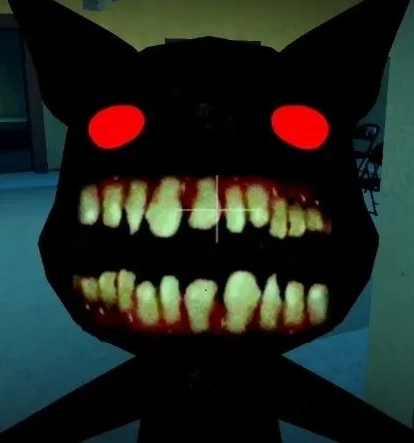
Threat reference art
Current wiki reference image for this specific threat, used to avoid mismatching one enemy with another.
A CCTV-only jumpscare anomaly tied to broken camera feeds rather than a normal roaming attack.
Do not stay zoomed in on a broken feed. Switch cameras or repair your scan path instead of lingering on the image.
Camera Figure only appears on broken cameras. Its main danger is forcing panic and breaking surveillance rhythm, not chasing players through rooms.
Encounter context
Enemies become much deadlier when you are already juggling sanity, room routing, and event timers. Good play is usually about composure, not just reaction speed.
Do not keep staring at a broken camera once the figure appears.
If this threat keeps wiping you
Best next step
Open the full enemy hub when you want the whole threat list instead of one encounter alone.
Useful when this threat becomes dangerous mainly because it overlaps with room pressure or timed emergencies.
Best follow-up when this enemy causes wipes because panic, hesitation, or bad recovery snowballs too fast.